Create a simple Alfred Workflow using Python
Alfred is a Mac-based app that can help increase your productivity through instant searches, hotkeys, snippets, and more. This article will be focused on one core feature: workflows. Using workflows, you can enable quick access to third-party apps, or even create custom flows to help with repetitive tasks. If you can do something with code, you can do it with workflows.
What you'll need to complete this tutorial:
- Alfred app with the Powerpack
- Basic Python knowledge
- Apple Music (you can also modify this tutorial to work with Spotify)
What we will be making
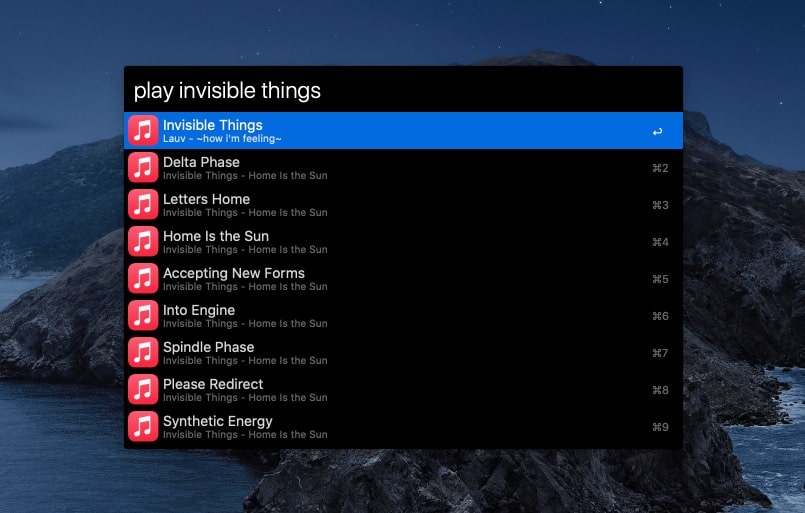
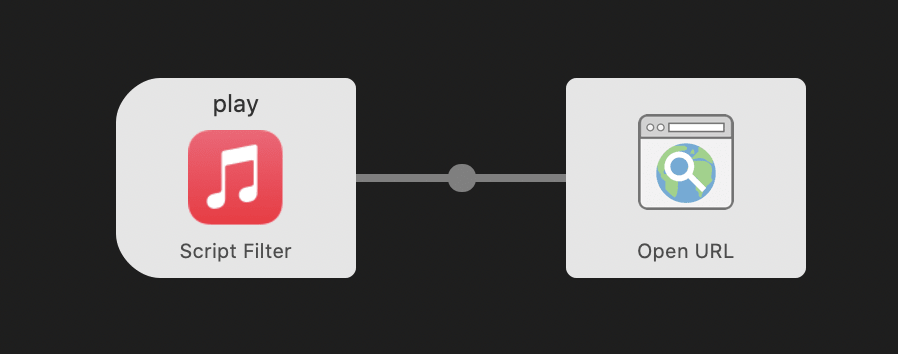
To understand what is possible using Alfred Workflows, we will be creating a simple workflow that enables us to find music on Apple Music quickly without having to open the app. Alfred will be running our custom Python script using the Script Filter object to generate the results based on our search. Here is the result:

Creating the Workflow
Step 1: Blank Workflow
Head over to the Workflows tab in the Alfred preferences and click the + button in the bottom and start a Blank Workflow.
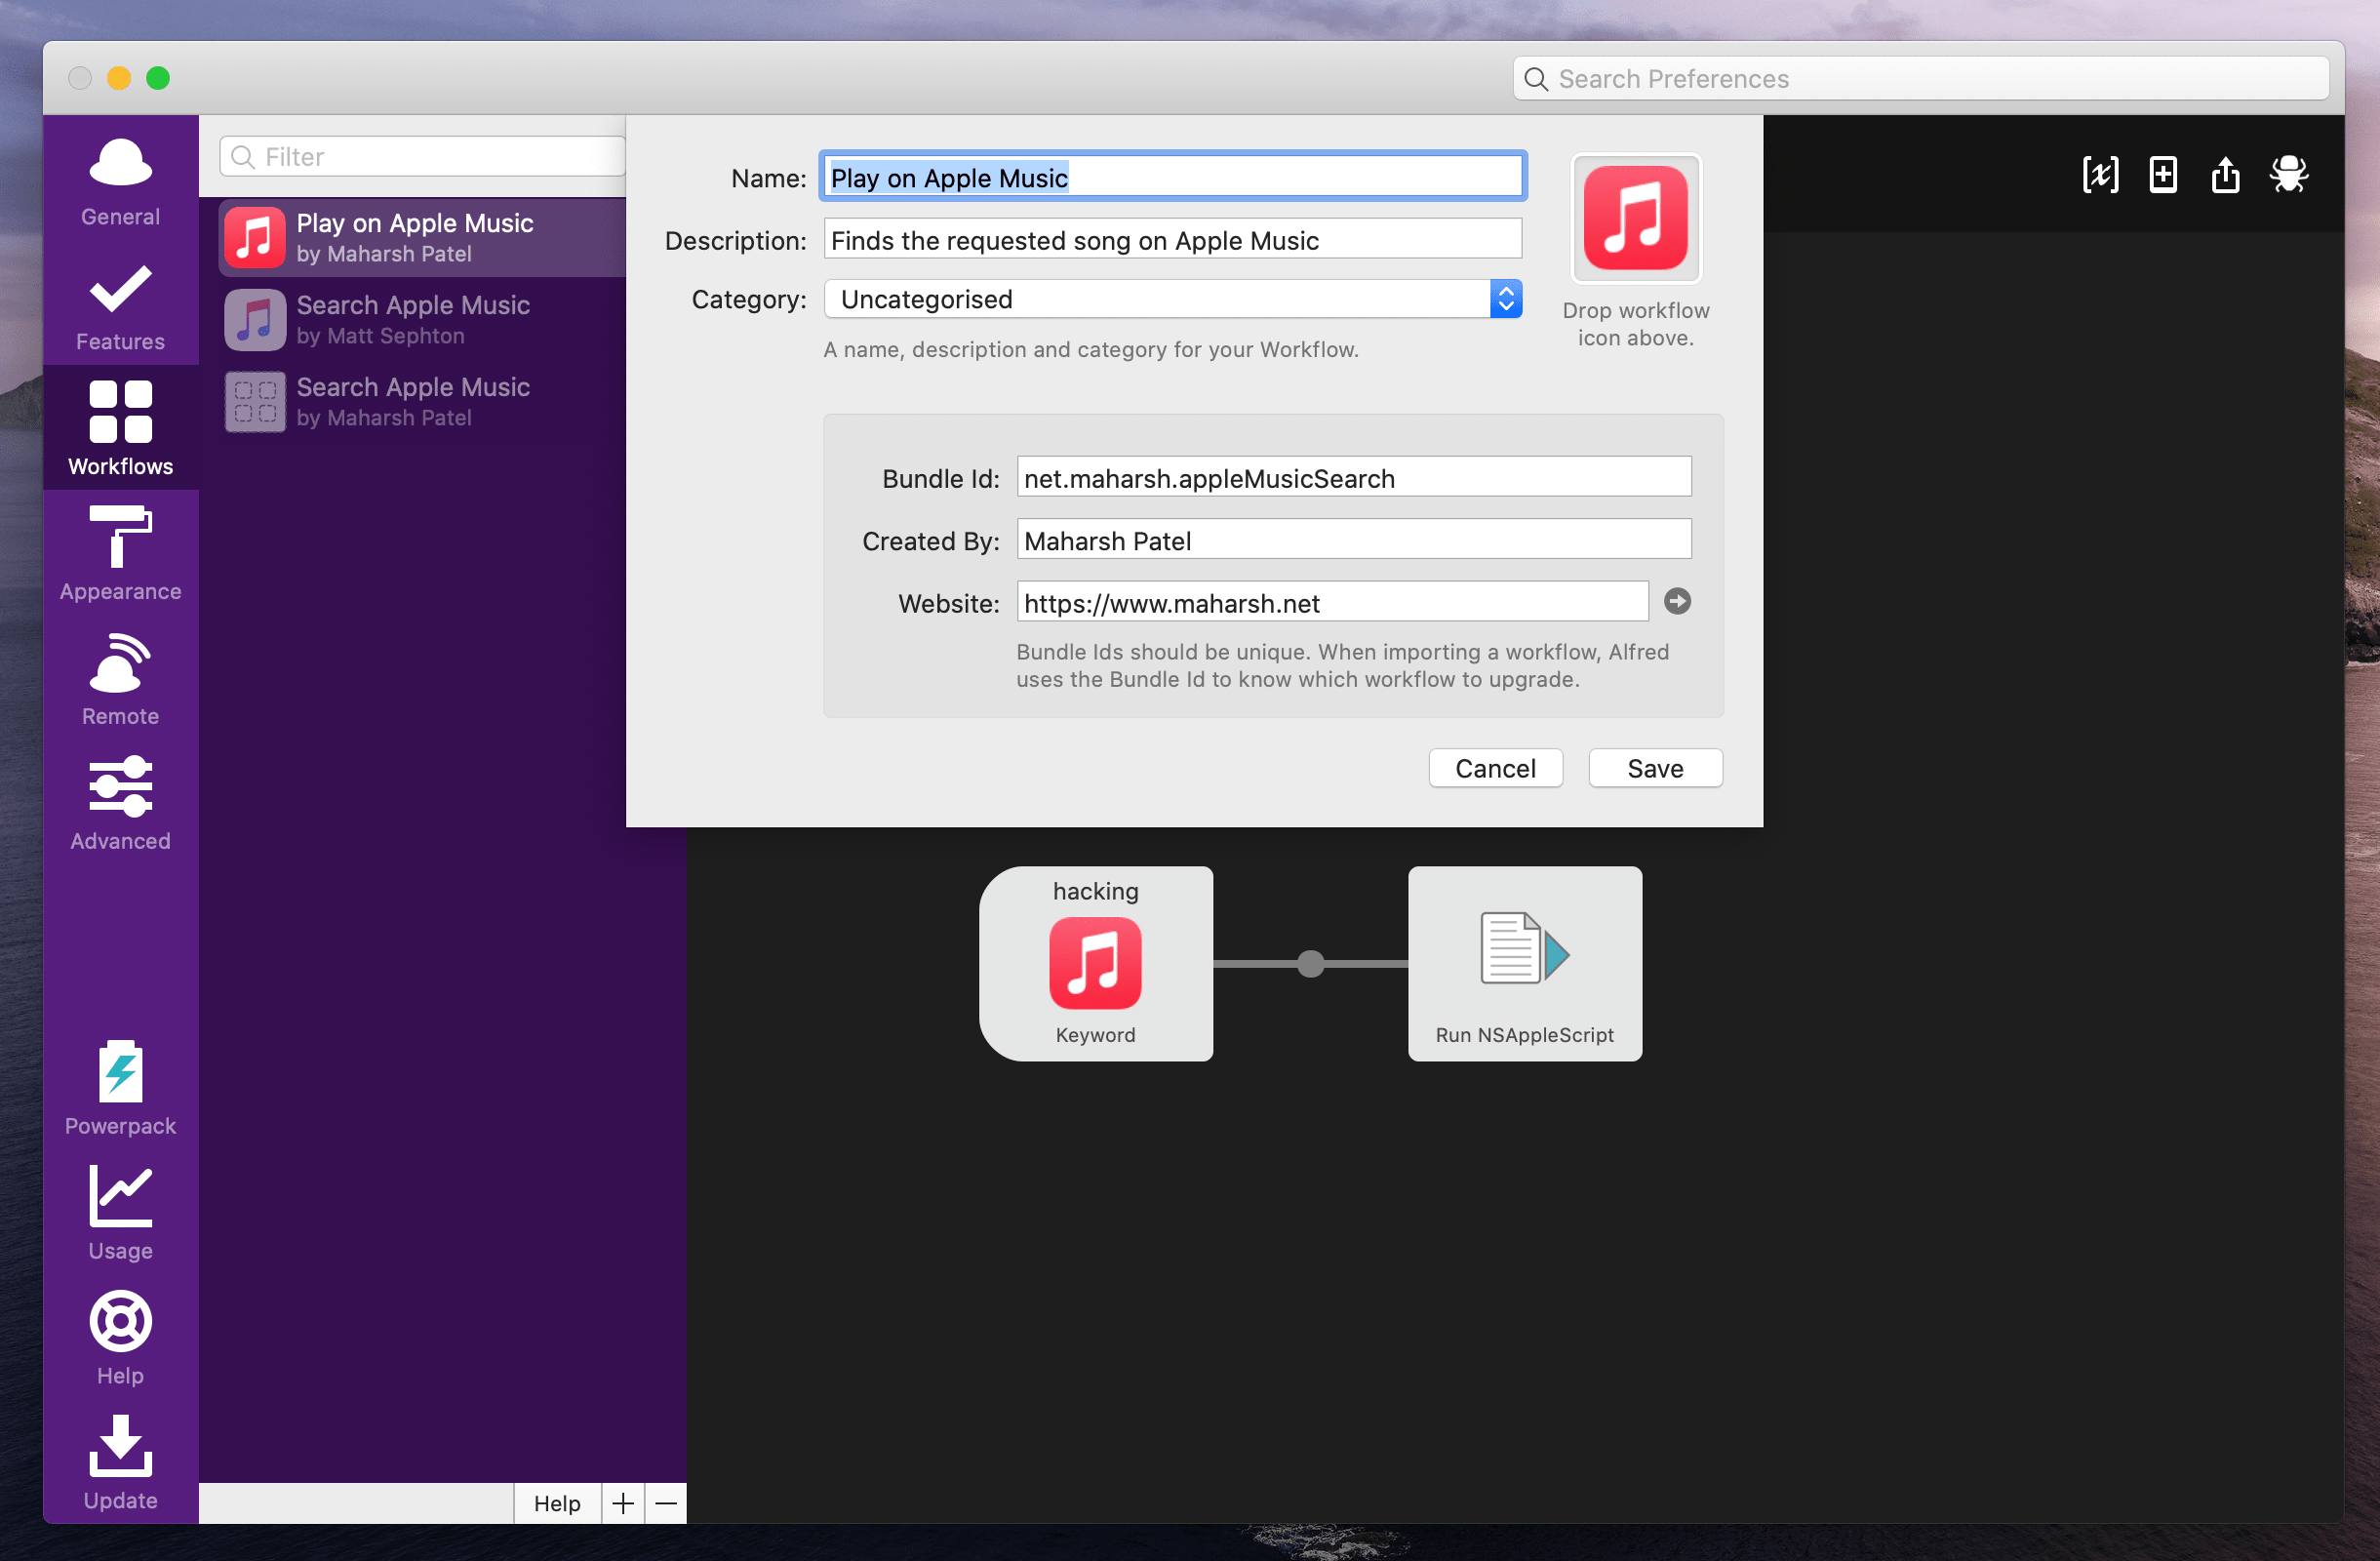
The details don't matter too much unless you are publishing your workflow after. Just choose a relevant name and image and click Save.
Step 2: Connecting to Python
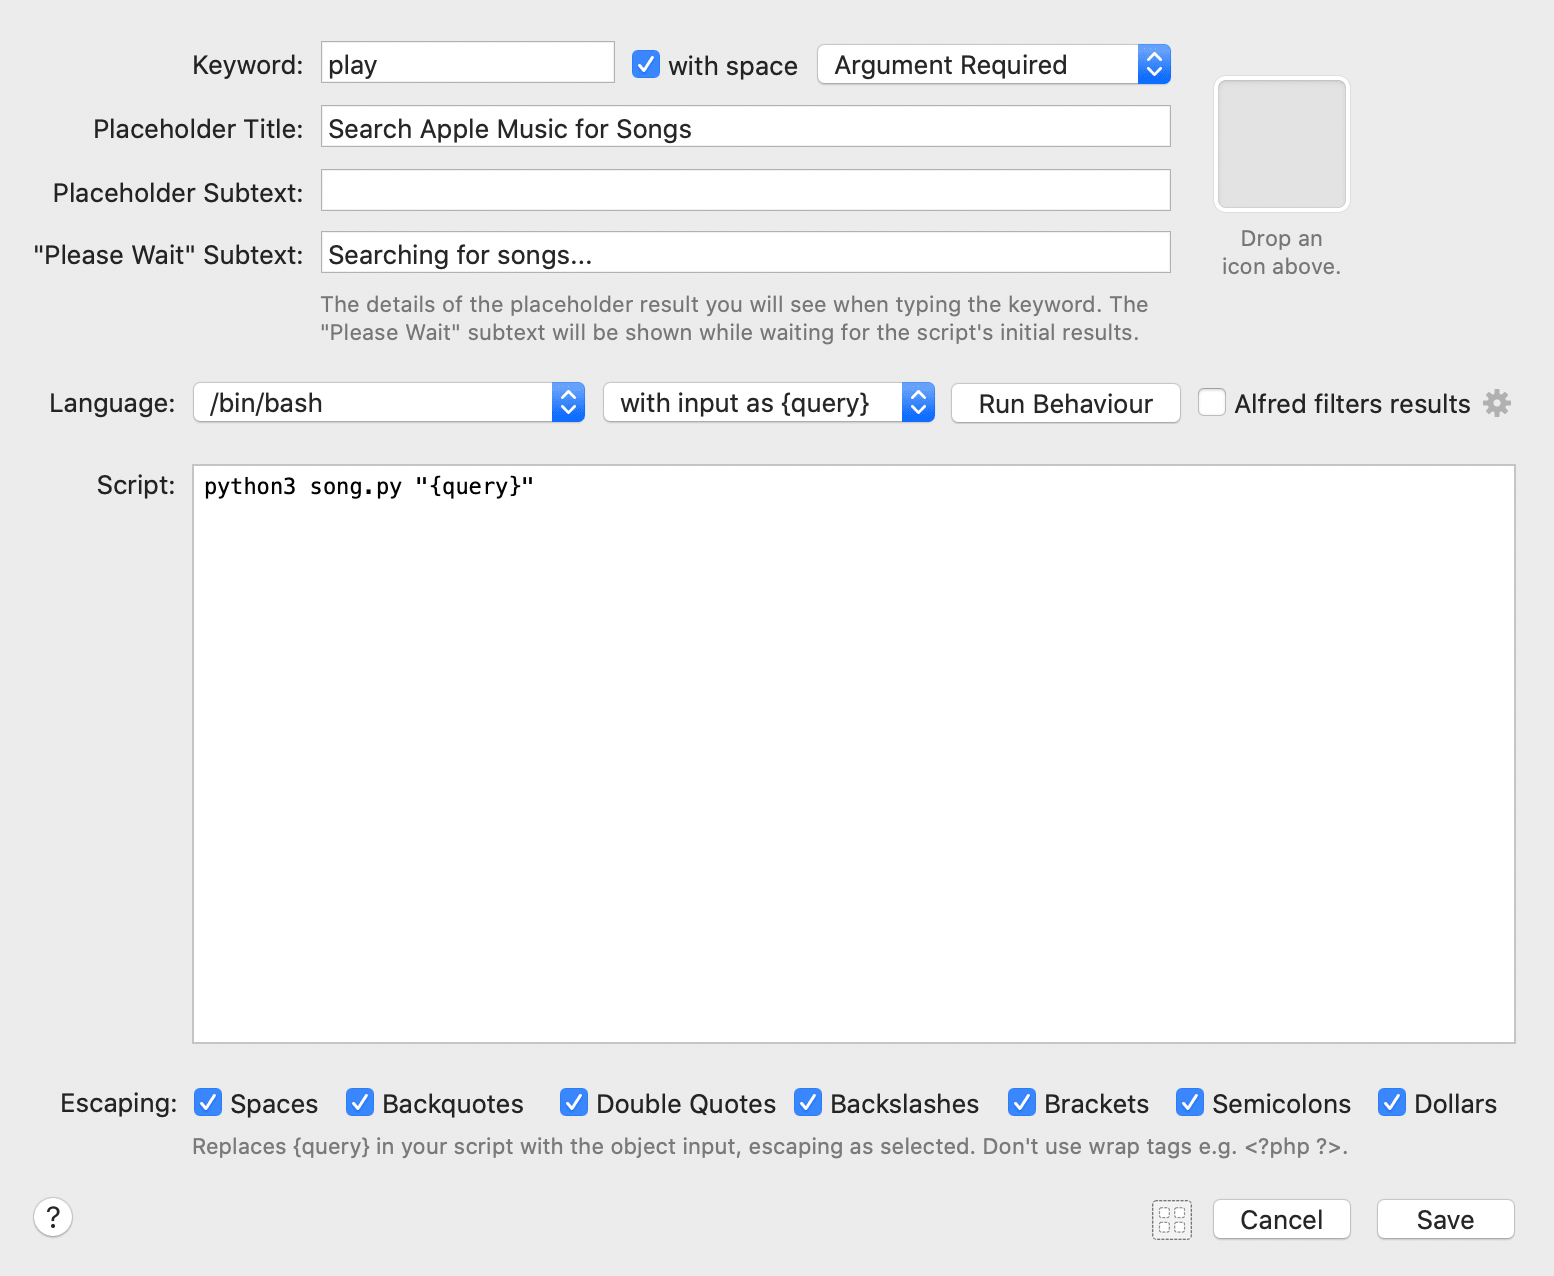
Right-click the workflow page to view different workflow objects. Here you can find a bunch of triggers and actions that you can use to create very powerful workflows. In this tutorial, we are interested in creating a workflow that will run a Python script when we type the trigger command "play". To do this, go to Inputs > Script Filter.
We want to be able to type "play invisible things" into Alfred to get a list of songs that match the query "invisible things". To do this, set our keyword to "play" and make sure that an argument is required. Fill out the text that you want to be displayed while you are triggering this workflow as shown below.
Script
In the script section, type in what is required to run your Python script. For now, just write python3 song.py "{query}" Alfred will pass in the input as {query} so we can use that as part of our bash script and pass it to our Python file. If you would like to work with another language, you can replace the script with whatever you would write in a terminal to execute your program.
You may be wondering: Where is song.py? We need to create this. Alfred stores all the files associated with your workflow in a specific folder. To find this folder, go back to the main workflows page. Right-click workflow > Open in finder.
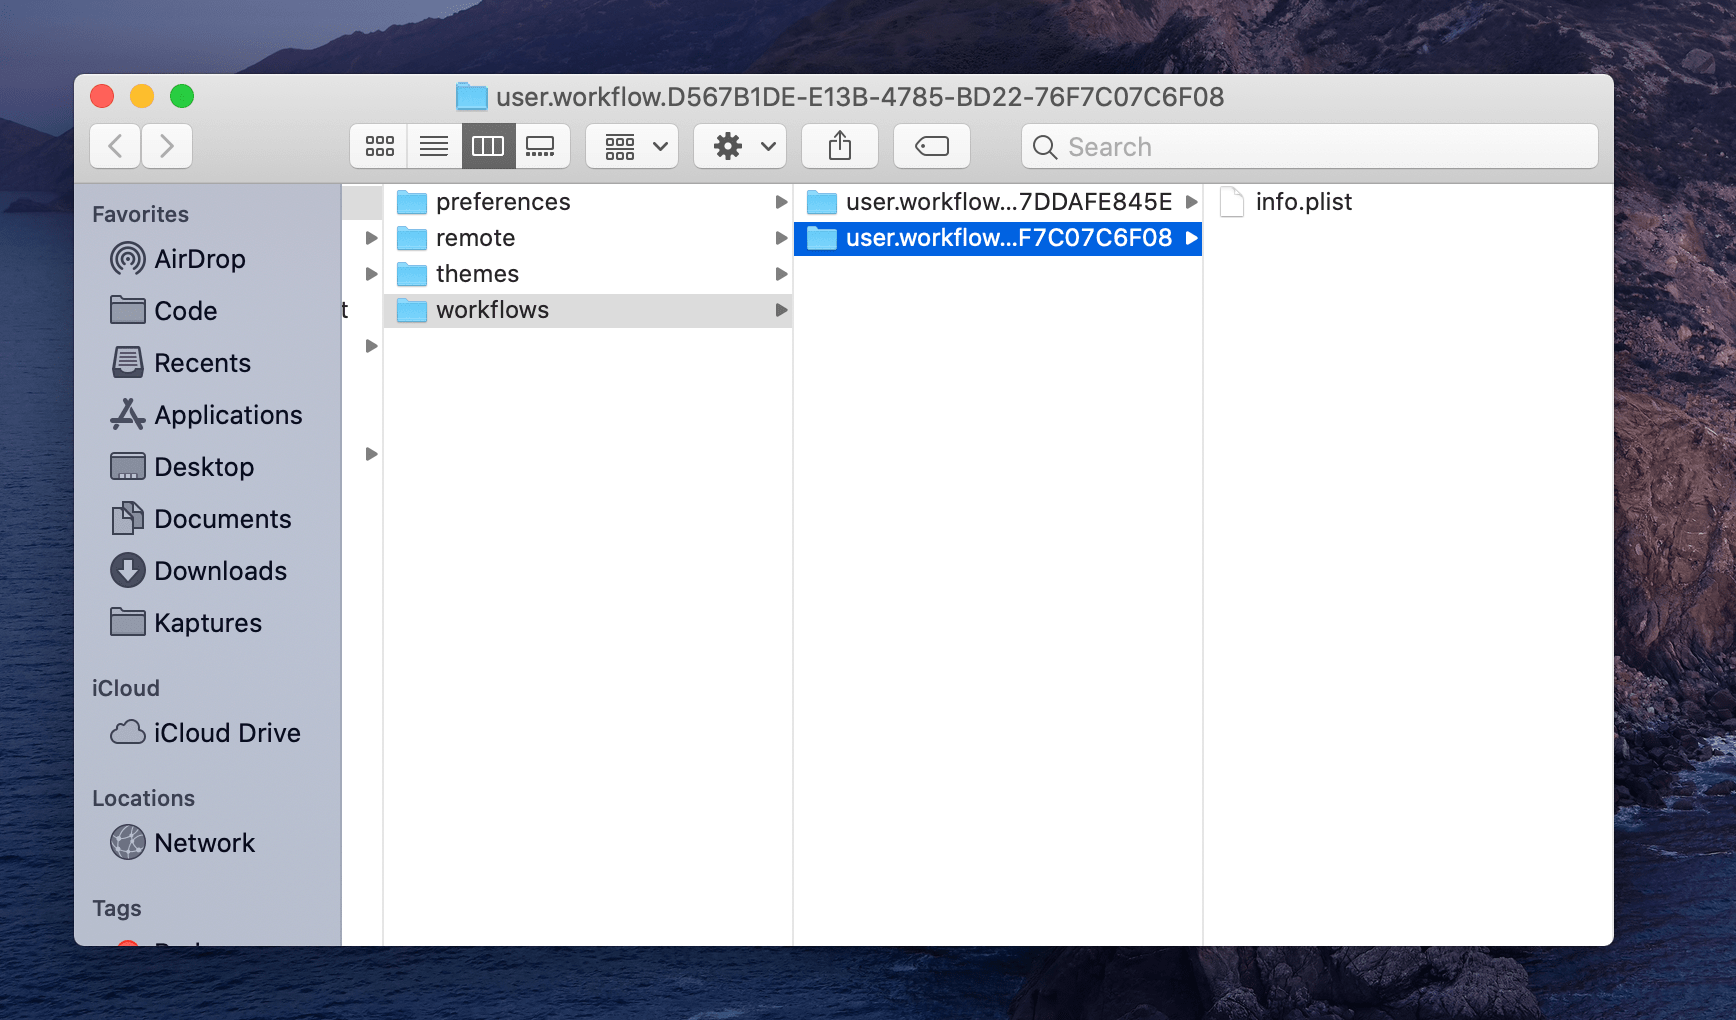
This folder will have the info.plist file initially. Don't touch this! It contains the metadata for your workflow. In the same folder, you can create the file song.py. This is what will be run by Alfred when you type in "play invisible things".
Step 3: Writing the Python script (Getting iTunes Data)
Input
Alfred will pass the input to us using system arguments. To retrieve this, we can do the following:
import sys

searchTerm = sys.argv[1:]
Processing
We can pass this search query to the iTunes Search API to find the matching songs.
import requests

api_url = "https://itunes.apple.com/search?term={}&entity=song&limit=20".format(searchTerm)
search_results = requests.get(api_url).json()["results"]
Output
To view the results through the Alfred dropdown, we need to return them in a specific way. Alfred accepts either XML or a JSON output - here we will do JSON.
import json

alfred_results = []

for item in search_results:
    result = {
        "title": item["trackName"],
        "subtitle": "{} - {}".format(item["artistName"], item["collectionName"]),
        "arg": item["trackViewUrl"].replace("https", "music") + "&app=music",
        "autocomplete": "{} {}".format(item["trackName"], item["artistName"]),
        "icon": {
            "path": "./icon.png"
        }
    }

    alfred_results.append(result)

response = json.dumps({
    "items": alfred_results
})

sys.stdout.write(response)
Fields Returned
title: the title displayed on the Alfred dropdownsubtitle: the subtitle displayed on the Alfred dropdownicon: the icon displayed on the Alfred dropdown (put your desired icon in the same folder as your song.py file)autocomplete: what Alfred will use to filter your resultsarg: the string that is passed to a connected action in your Workflow
For more fields that can be used, look at the Alfred Docs.
The iTunes API gives us a normal URL that we can use in a browser to view the song. For this Workflow, we want it to automatically open the song in Apple Music instead of the browser. To do this, we can change the scheme from https to music and then append &app=music at the end.
Step 4: Opening the Song in Apple Music
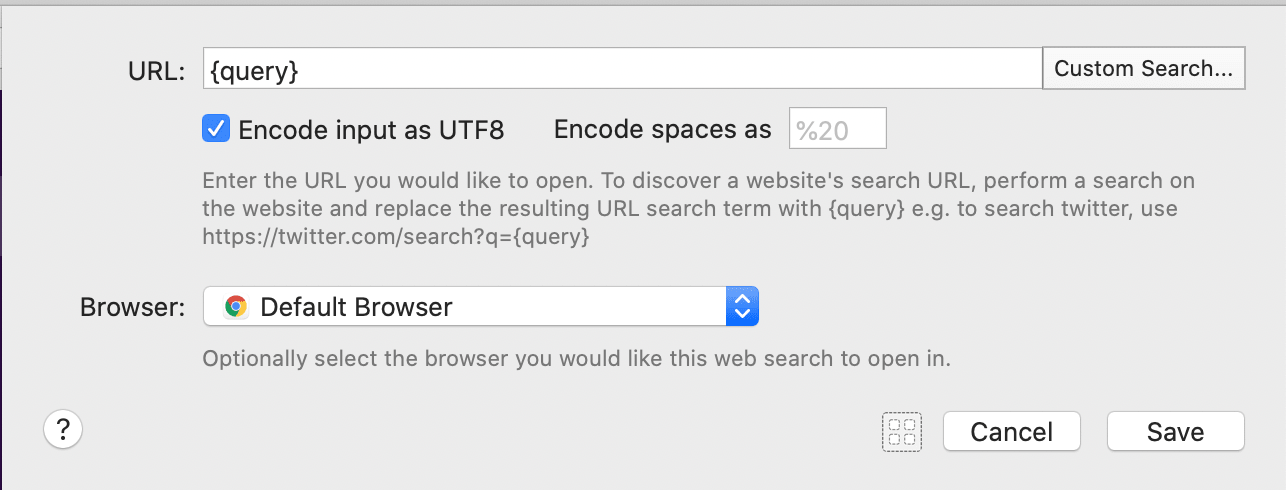
The last step remaining is to open the song in Apple Music. In the previous section, we talked about the arg parameter. This will get passed to any connected workflow objects. We can simply create a new workflow object by Right-clicking and going to Actions > Open Url. Set the URL to {query} and then connect both blocks.
Step 5: Debugging
Now you can test out your workflow by opening up Alfred and typing "play" followed by a search query. If you are not getting the results you expected, you can try debugging the workflow. This can be done either by debugging the Python file in isolation or by using the Workflow debug mode using cmd+d
Downloads / Conclusion
This tutorial covered a basic workflow example using Alfred. In this case, it allowed us to run our Python script more quickly, and also allowed us to interact with the results. The same learnings can be applied to many other applications. For example, you can create a workflow where you type in a stock ticker symbol and it can give you the current stock price. Or you can create a workflow that interacts with Jira and lets you update the status of a ticket without opening up the website. Alfred allows for very powerful workflows that can help speed up parts of your life. You can download this workflow and the associated code from my Github.
If you have questions about this article, feel free to reach out to me via email.